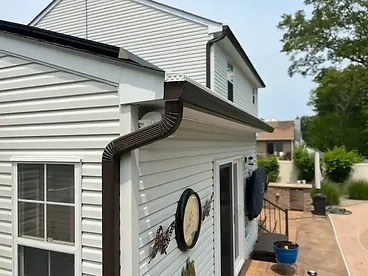
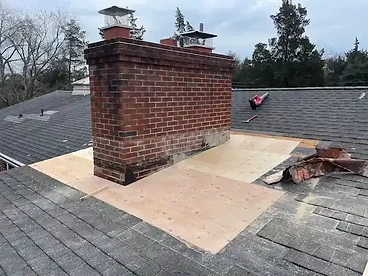
Siding Installation
Durable siding installation that improves curb appeal, energy efficiency, and weather protection for South Jersey homes.
Quality siding does more than make your home look great. It's a critical barrier against wind, rain, and moisture, and it plays a major role in your home's energy efficiency. Old or damaged siding allows water infiltration that can rot sheathing, invite mold, and compromise your home's structure.
Veterans Roofing installs premium vinyl and fiber-cement siding systems engineered for South Jersey's coastal climate. We handle everything from moisture barrier and flashing to trim and finish work, ensuring every detail is done right for a result that looks beautiful and performs for decades.
Signs Your Siding Needs Replacing
Siding deteriorates gradually. Here's what to look for as it ages:
- Cracking, splitting, or warping siding panels
- Fading or significant discoloration from UV exposure
- Rot or soft spots in wood or fiber-cement siding
- Higher than expected heating or cooling bills
- Mold, mildew, or algae growth that keeps coming back
- Loose or missing sections of siding after storms
- Bubbling or blistering on the siding surface
- Paint that needs repainting every few years
Explore Siding Styles & Colors
Your siding defines your home's character. Explore popular siding styles available for your project.

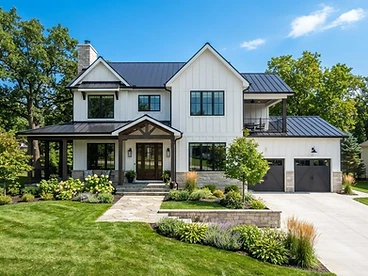
Board & Batten
Vertical siding with wide boards and narrow battens. A modern farmhouse look that adds height and architectural interest.


Traditional Lap Siding
Classic horizontal overlapping panels. The most popular siding style in South Jersey, available in dozens of colors.

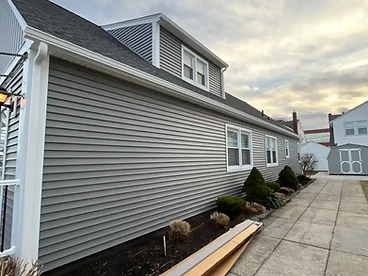
Premium Vinyl System
Full siding system with moisture barrier, trim, and accessories engineered to work together for lasting performance.
Credentials & Warranties
Certified Expertise for This Service
Our manufacturer certifications and warranty eligibility directly affect the coverage available on your project.
What to Look For in a Siding Installation
A great siding job is about the system, not just the panels. Here's what separates quality installation from the rest:
Moisture Barrier
A proper installation starts with a weather-resistant barrier beneath the siding. This is your home's second line of defense against water infiltration. Skip it, and you risk hidden rot.
Proper Flashing
Flashing around windows, doors, and rooflines directs water away from vulnerable areas. Improperly flashed siding is the #1 cause of water damage behind siding.
Expansion Gaps
Vinyl siding expands and contracts with temperature. A skilled installer leaves the correct gap at each joint so panels don't buckle in summer or gap in winter.
Quality Trim & Accessories
Corner posts, J-channels, and window trim should be color-matched and installed cleanly. These details are what separate a professional job from an amateur one.
Ventilation Considerations
Siding needs to breathe. A proper installation allows air circulation behind the siding to prevent moisture buildup and mold growth.
Manufacturer Warranty
Premium siding products come with strong manufacturer warranties — but only when installed by a certified contractor according to the manufacturer's specifications.
Your Vision. Our Process.
Installation Day
Property Protection & Tarping
Before a single shingle comes off, your Project Supervisor makes sure the area around your home is completely prepped. The surrounding area is cleaned, tarps are installed from the eaves down to the ground, and a safe zone is created for shingles, debris, and thousands of nails to come off the roof cleanly and safely.
Prep & Tarp the Area
- Clear the surrounding area — move patio furniture, garden ornaments, potted plants, and anything fragile within the work zone
- Sweep and clean the ground below the eaves so the tarps lay flat and secure
- Roll out heavy-duty tarps from the roof eaves down to the ground, creating a vertical wall that catches everything coming off the roof
- Secure tarps tight against the home so shingles, debris, and thousands of nails slide safely down into the debris trailer — not into your landscaping
- Lay ground-level tarps as a second layer of protection for anything that rolls past the vertical barrier
- Final check by your Project Supervisor before the first shingle comes off


Tarps secured from eave to ground, creating a debris chute

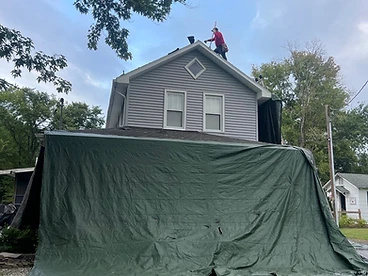
Full wall protection on a two-story home

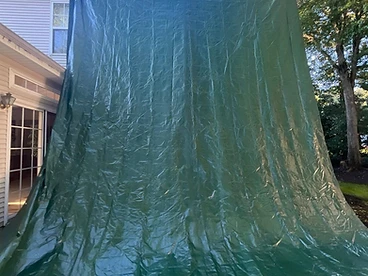
Vertical barrier catches shingles, nails, and debris

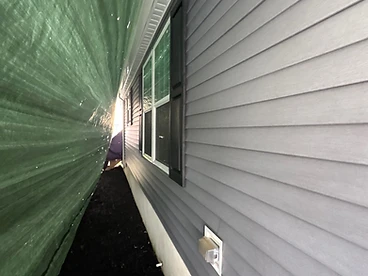
Tarp secured tight against the home's exterior

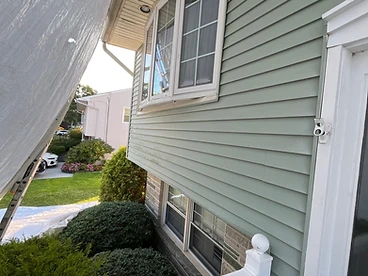
Tarp held taut and secured with ladder support

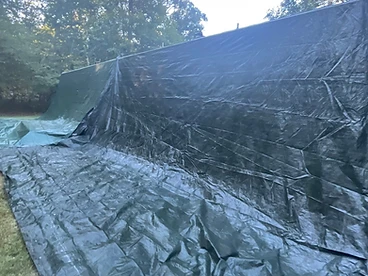
Heavy-duty tarps rated for roofing debris

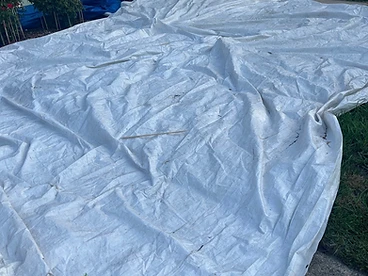
Ground-level tarps catch anything that rolls past the barrier
Installation Day
The Tear-Off
Once your home is protected, the crew begins the tear-off — physically removing every old shingle, piece of underlayment, nail, and flashing down to the bare wood deck. This is the only way to truly see what's underneath and make sure your new roof is installed on a clean, sound surface. Your Project Supervisor is on the roof overseeing every section as it's exposed.
Strip the Roof to the Deck
- With the property protected and tarps in place, the crew begins removing every old shingle down to the bare wood deck
- Specialized tear-off tools pry up shingles and old underlayment in clean sections — not piece by piece
- Old nails, flashing, and vent boots are pulled so the deck is completely clear and ready for inspection
- All torn-off material slides down the tarps directly into our company-owned debris trailer — never into your yard
- Your Project Supervisor is on the roof monitoring the tear-off, checking for soft spots as the deck is exposed
- The entire roof is stripped methodically, section by section, so nothing gets covered up or missed

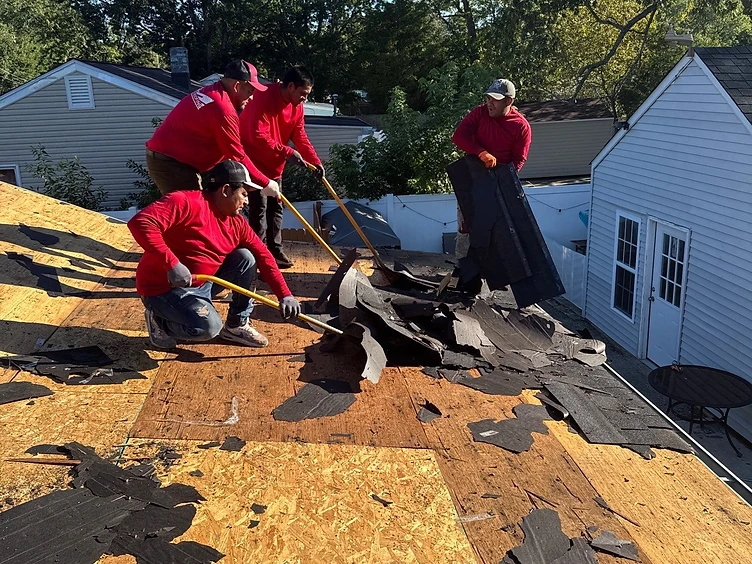
Crew prying up old shingles — the wood deck emerges underneath

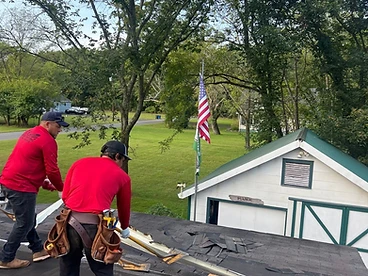
Specialized tear-off tools lift shingles in clean sections

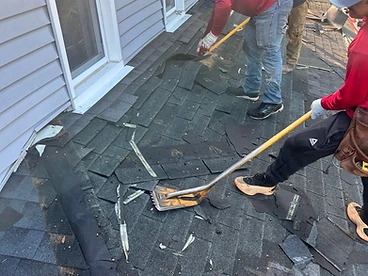
Every shingle comes off — down to the bare deck

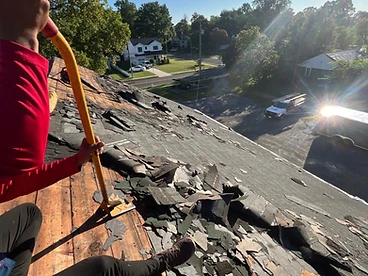
Old shingles and underlayment stripped to expose the sheathing

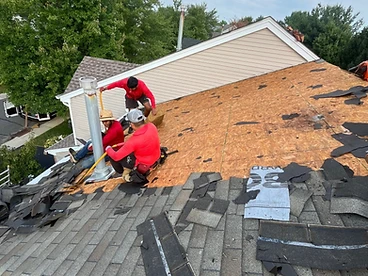
Tear-off in progress — intact shingles below, exposed deck above
Installation Day
Deck Inspection & Wood Replacement
Once the old shingles and debris are completely removed, your Project Supervisor inspects the exposed roof deck. Any plywood that's soft, rotted, or water-damaged gets removed and replaced right then — so your new roofing system is installed on a solid, sound foundation. Every sheet we replace is labeled with spray paint for transparency, so you can see exactly what was done.
Inspect & Replace Compromised Wood
- After tear-off, your Project Supervisor walks every inch of the exposed roof deck
- Soft, rotted, or water-stained plywood is identified and marked for replacement
- Compromised sheets are removed and hauled to the debris trailer — nothing gets covered up
- Fresh plywood or OSB is cut, fitted, and nailed securely to the rafters
- Every replaced sheet is labeled with spray paint so we can track it and you can see it
- A solid, sound deck means your new shingles and underlayment have a proper foundation to adhere to

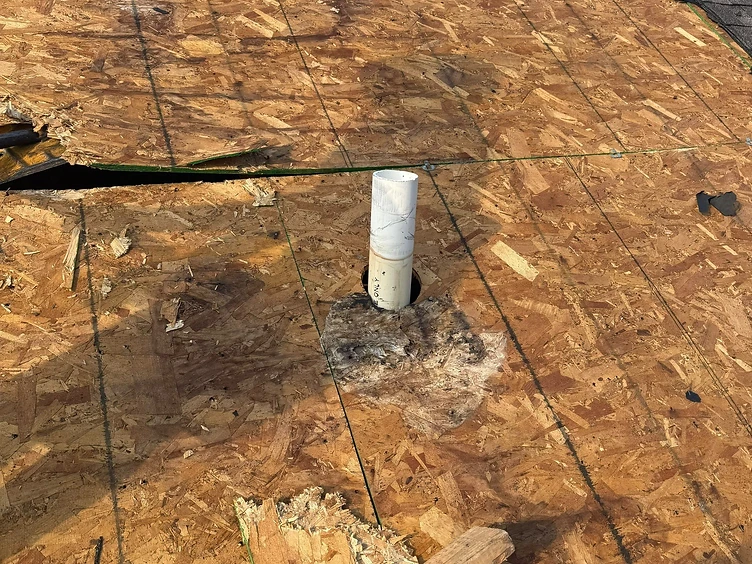
Water-damaged decking identified around a vent penetration

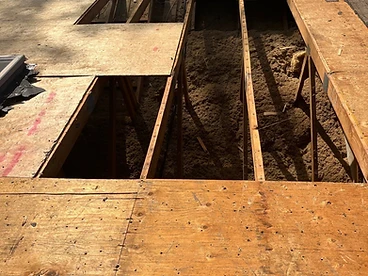
Compromised sections removed — attic exposed for inspection

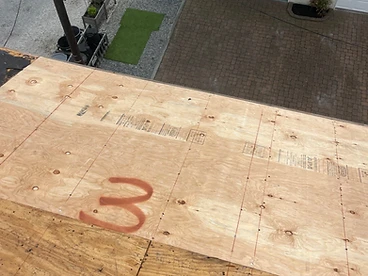
Each replaced sheet labeled with spray paint for tracking

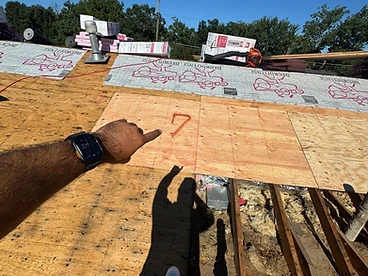
Your Project Supervisor marks and tracks every replacement

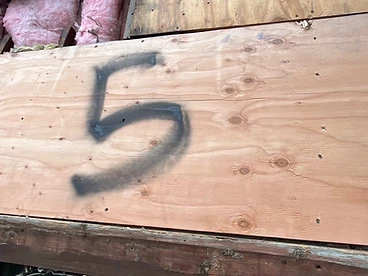
Numbered sheets keep the process transparent for homeowners

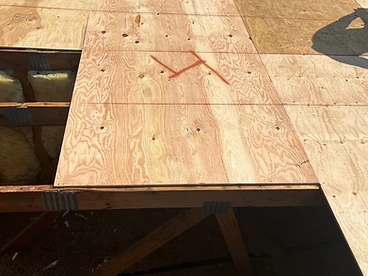
Fresh decking installed and secured over the rafters

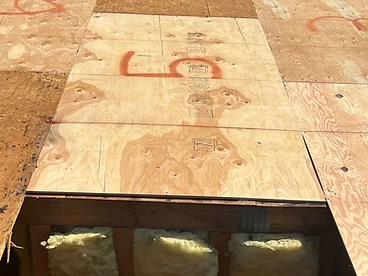
New vs. weathered — you can see exactly what was replaced
Installation Day
Eave Drip Edge Installation
Once the deck is solid and sound, the first piece of your new roofing system goes on — the eave drip edge. This metal flashing is installed along every roof edge to direct water cleanly off the roof and into the gutters, protecting the wood edge from rot and stopping water from sneaking back under the decking. It's a small detail that makes a big difference in how long your roof lasts.
Install the Eave Drip Edge
- With the deck inspected and any compromised wood replaced, the crew installs the eave drip edge along every roof edge
- Metal drip edge is fastened securely over the deck edge so water runs off the roof and into the gutter — never behind the fascia
- This is the first layer of your new roofing system, installed before any underlayment or shingles
- Proper drip edge prevents water from wicking back under the decking and protects the wood edge from rot
- Your Project Supervisor verifies every section is tight, aligned, and properly lapped before moving on

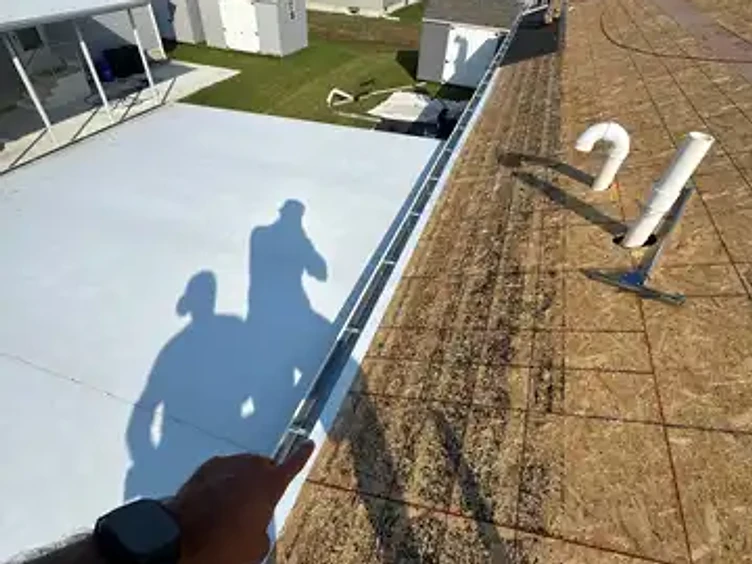
Metal drip edge installed along the eave before any underlayment goes down

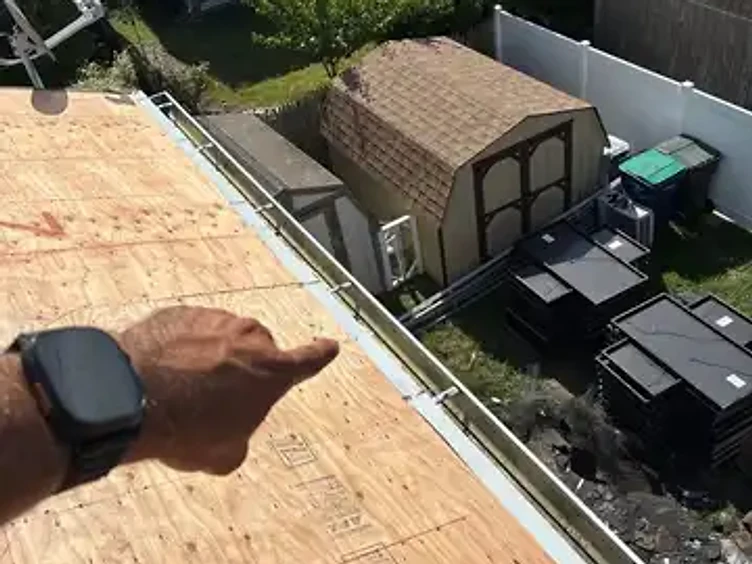
Edge hardware fastened at regular intervals along the eave

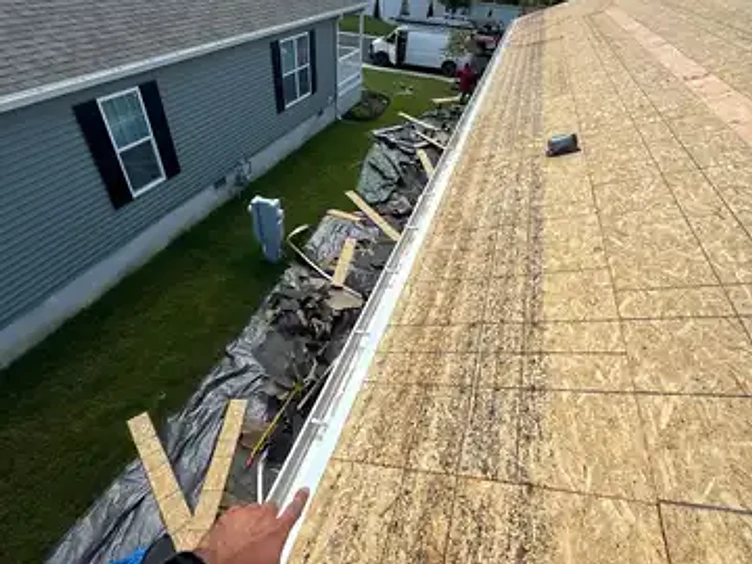
Drip edge creates a clean transition between deck and gutter line
Installation Day
Ice & Water Shield
Before the rest of the underlayment goes down, we install a self-adhering ice and water shield on every leak-prone area of your roof — the eaves, the valleys, around every pipe boot and chimney, and anywhere step or wall flashing will tie in. Its adhesive backing bonds directly to the deck and seals around every nail driven through it, giving you a waterproof barrier exactly where roofs most often fail.
Seal Every Leak-Prone Area
- After the drip edge is in, self-adhering ice and water shield is applied to every leak-prone area on the roof
- Eaves get full coverage — this is what stops ice dams from backing water up under your shingles in a South Jersey winter
- Valleys, where two roof planes meet and water concentrates, are lined completely
- Around every man-made penetration — pipe boots, chimneys, skylights, and vent stacks — a dedicated patch is sealed down
- Where step and wall flashings will go, the shield is installed first so metal flashing ties into a waterproof base
- The adhesive backing bonds directly to the deck — it seals around every nail that gets driven through it later
- Your Project Supervisor verifies every critical area is covered before the synthetic underlayment goes down across the rest of the roof

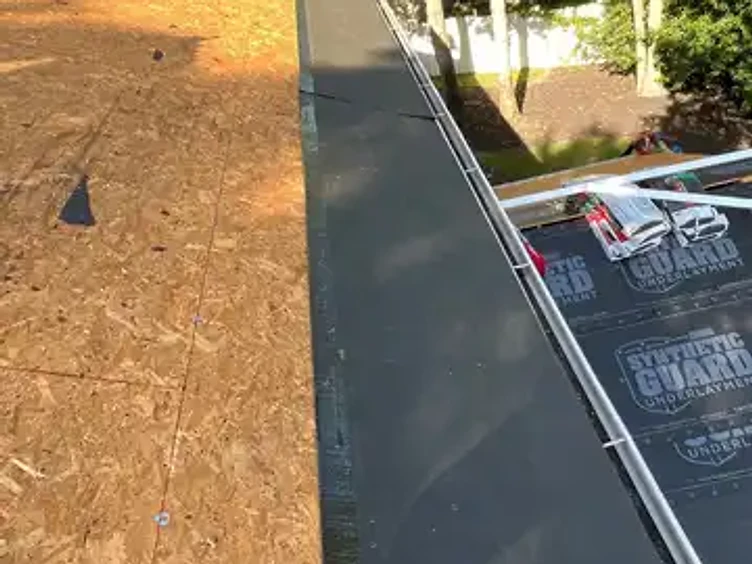
Ice and water shield laid along the eave — the first line of defense against ice dams

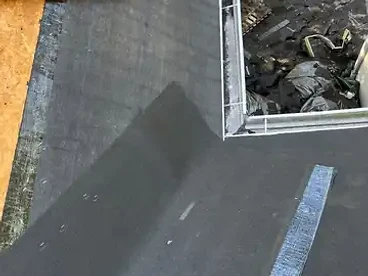
Valleys get full coverage — where two roof planes meet, water concentrates

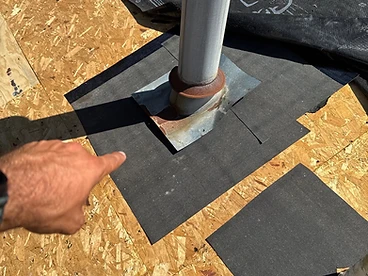
Pipe boots and penetrations sealed with a dedicated shield patch

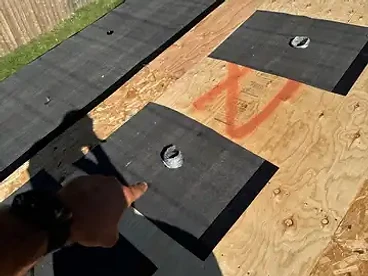
Every penetration marked and sealed — nothing gets missed

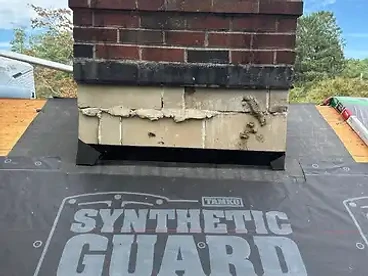
Chimney base sealed — a notorious leak point if skipped

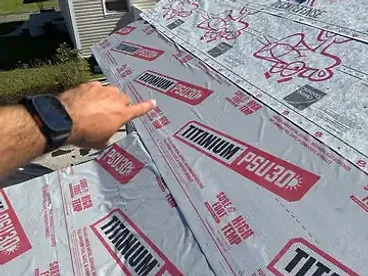
Self-adhering membrane bonds directly to the deck — no nails, no gaps
Installation Day
Synthetic Underlayment
Once the ice and water shield is down on every critical area, premium synthetic underlayment is rolled out across the rest of the roof. Installed in overlapping courses from the bottom up, it creates a full secondary barrier that sheds any water that ever gets past the shingles — your roof's backup defense, covering every square foot of the deck.
Cover the Full Roof Deck
- With the leak-prone areas sealed, synthetic underlayment is rolled out across every remaining section of the roof
- Courses are laid horizontally from the bottom up, each row overlapping the one below so water always sheds downhill
- The material is fastened with cap nails or button cap staples so it stays put and seals around every fastener
- All seams are overlapped to manufacturer specifications — no gaps, no exposed edges
- Underlayment is carried up and over the ridge so the entire roof deck is protected
- This secondary barrier sheds any water that ever gets past the shingles — your roof's backup defense
- Your Project Supervisor confirms full coverage before a single shingle is laid

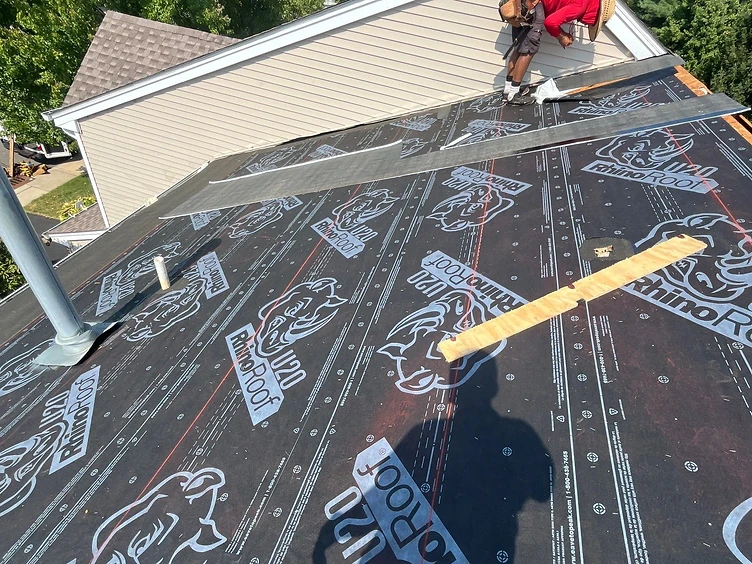
Synthetic underlayment rolled out in overlapping courses across the deck

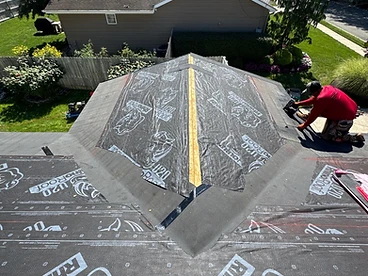
Underlayment fastened securely — every row nailed to manufacturer specs

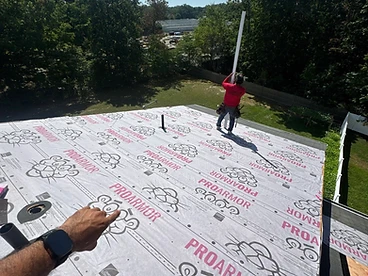
Premium synthetic underlayment covers the full field of the roof

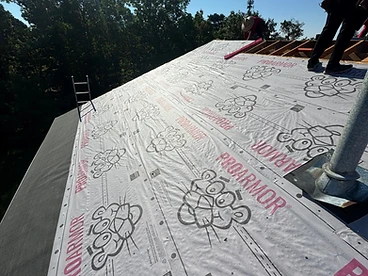
Each course overlaps the one below — water always sheds downhill

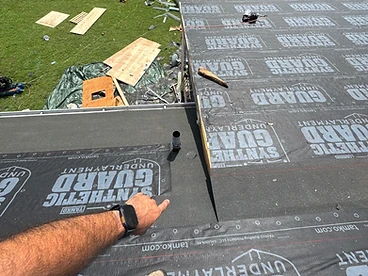
Every penetration and seam tied in — no exposed deck left behind
Installation Day
Rake Edge Drip Edge
After the underlayment covers the deck, metal drip edge is installed along every rake — the sloped gable edges of the roof. Sitting on top of the underlayment, it directs water cleanly off the side and protects the wood edge from rot. With the eaves, rakes, and all edges sealed, the entire perimeter of your roof system is protected before a single shingle goes down.
Install the Rake Drip Edge
- With the underlayment down, metal drip edge is installed along every rake — the sloped gable edges of the roof
- The rake edge sits on top of the underlayment and directs water cleanly off the side of the roof, protecting the wood edge below
- It's fastened at regular intervals so it stays tight and straight for the life of the roof
- This seals the perimeter of the roof system — eaves, rakes, and all edges protected before a single shingle is laid
- Your Project Supervisor checks every rake for proper overlap and alignment before shingle installation begins

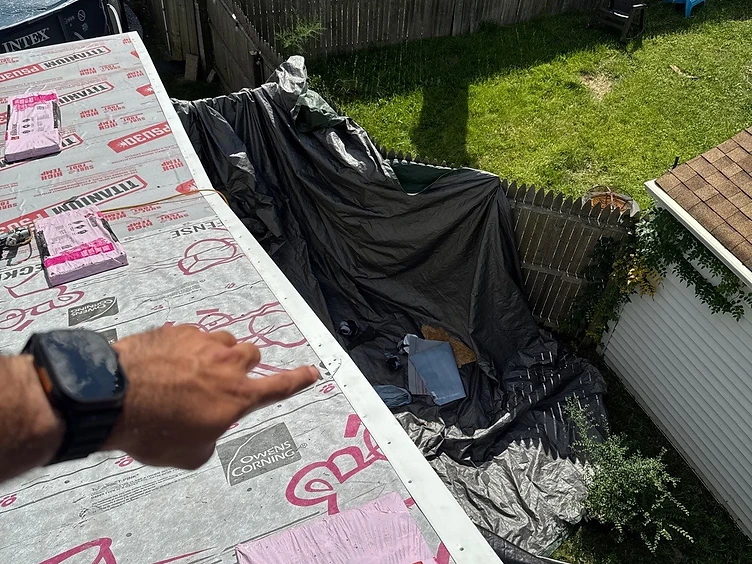
Rake edge installed along the sloped gable side of the roof

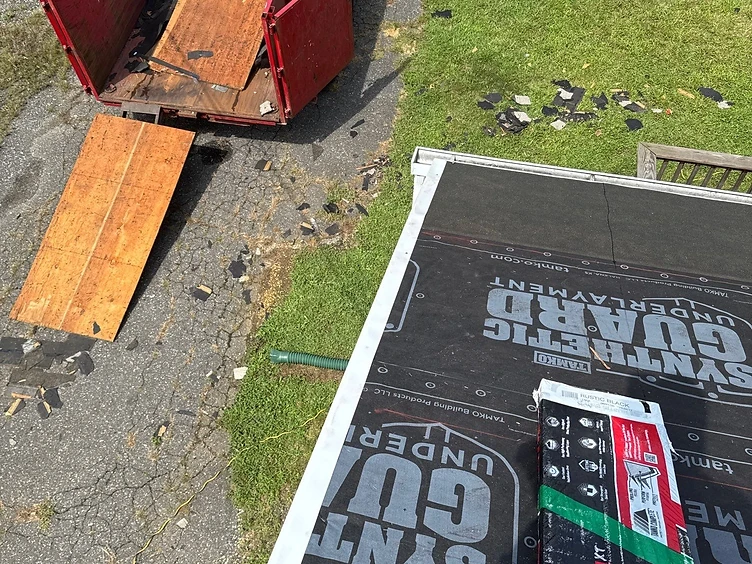
Metal rake edge sits on top of the underlayment, shedding water past the gable

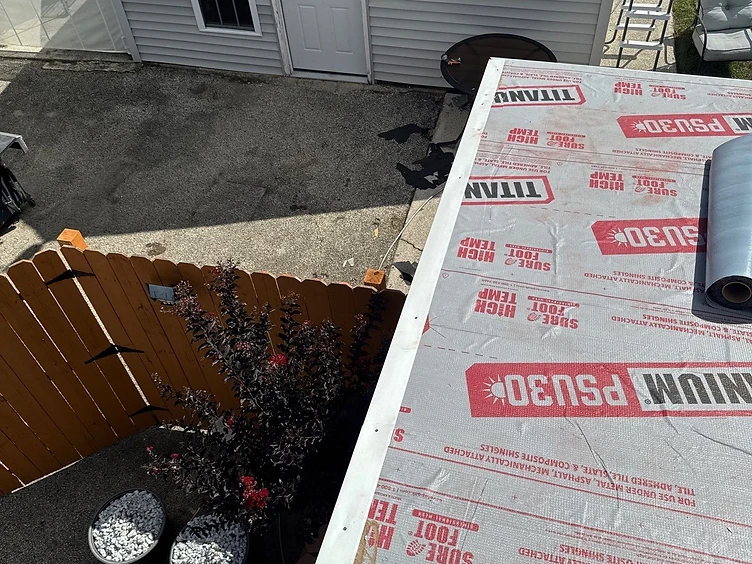
Fastened at regular intervals — straight, tight, and aligned

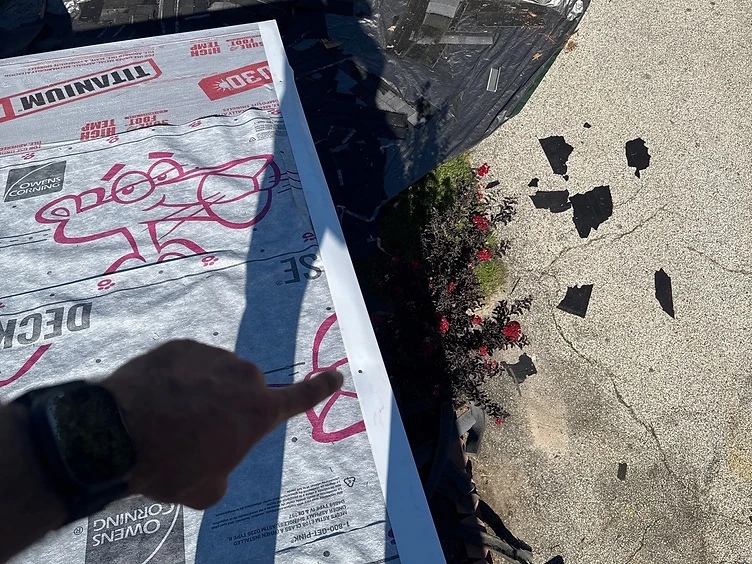
Rake edge completes the perimeter protection before shingles go down
Installation Day
Starter Strip Installation
Once the drip edge and underlayment are in place, starter strip is installed along every eave and rake. The starter strip carries a continuous adhesive tar strip that gives the first course of shingles a full 360° seal — locking the bottom edge of every shingle down and securing the roof against side winds. It's the foundation of a roof that holds in a storm, and it's required to keep the manufacturer's wind warranty intact.
Seal the Perimeter with Starter Strip
- With the perimeter sealed, starter strip is installed along every eave and rake of the roof
- The starter strip carries a continuous adhesive tar strip — giving the first course of shingles a full 360° seal
- That 360° adhesion is what locks the bottom edge of every shingle down and secures the roof against side winds
- It's fastened at the manufacturer's required nail pattern so the wind warranty stays intact
- Proper starter strip installation is the difference between a roof that holds in a storm and one that doesn't
- Your Project Supervisor verifies full coverage on every eave and rake before the first shingle course goes down

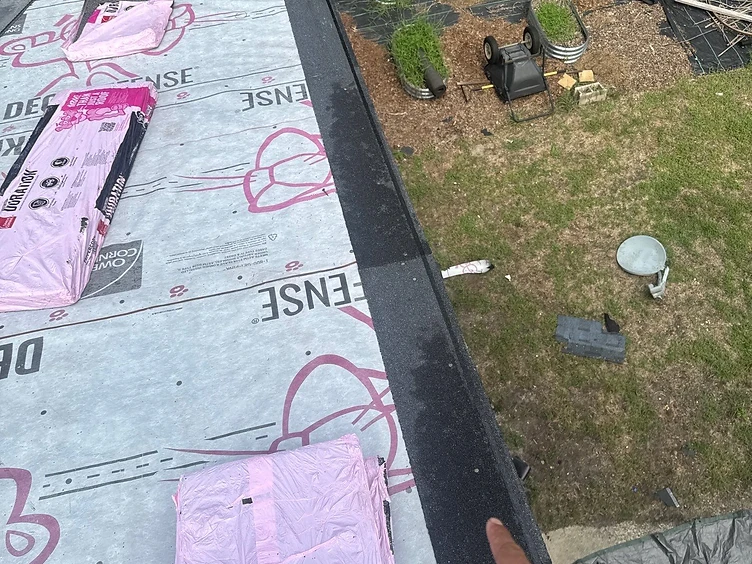
Starter strip laid along the eave — the first course every roof depends on

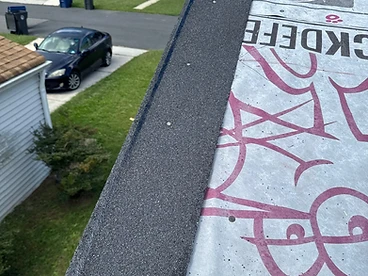
Fastened at the manufacturer's required nail pattern

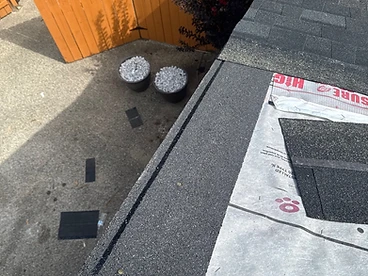
Starter strip overlaps the drip edge — sealed from the very edge

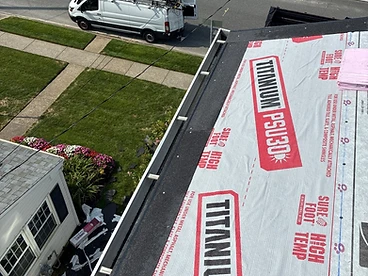
Installed along every eave and rake — full perimeter coverage

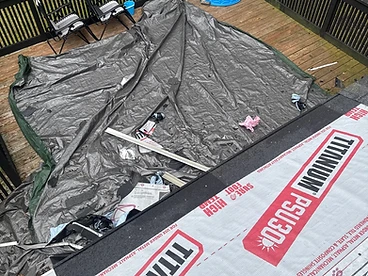
The adhesive strip on the starter locks the first shingle course in place
Installation Day
The Shingling Process
With the starter strip down, the shingling process begins. Chalk lines are struck across the roof to guide every course — ensuring proper exposure and alignment so each shingle sits straight and every row is consistent. Then shingles are installed from the bottom up, stepping up the slope course by course. Each course overlaps the one below, covering the nails of the previous row so no fasteners are ever exposed to the weather.
Strike Lines & Step the Shingles
- With the starter strip in place, chalk lines are struck across the roof to guide every course
- Chalk lines ensure proper exposure and alignment — so every shingle sits straight and every course is consistent
- Shingles are then installed from the bottom up, stepping up the slope course by course
- Each course overlaps the one below, covering the nails of the previous row so no fasteners are exposed
- Shingles are staggered at the seams to prevent water from tracking between courses
- Every shingle is nailed to the manufacturer's required pattern — keeping the wind warranty intact
- Your Project Supervisor is on the roof checking alignment, nail placement, and coverage as the slope fills in

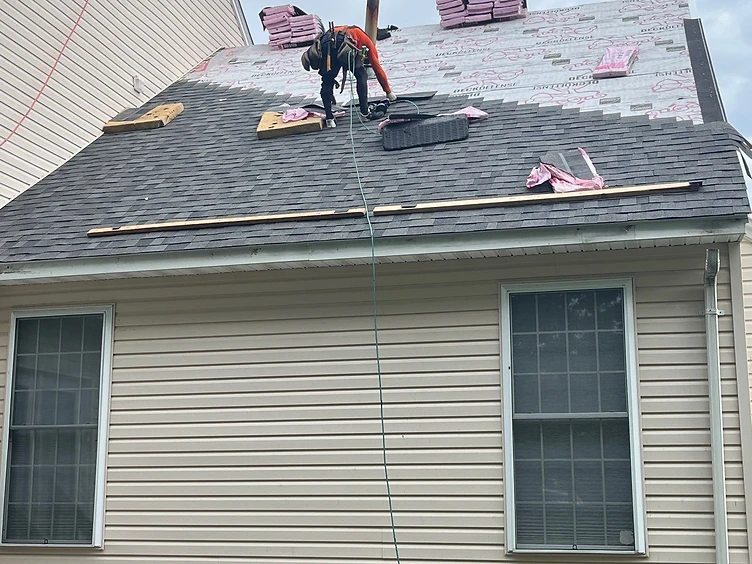
Shingles installed from the bottom up — working toward the ridge

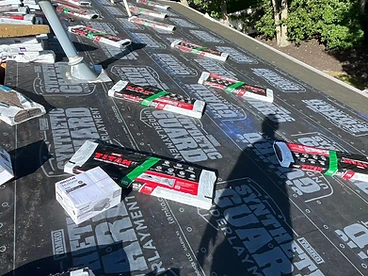
Shingle bundles staged and ready — materials laid out across the slope

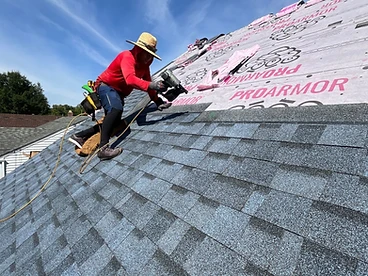
Every shingle nailed to manufacturer spec — straight, tight, and aligned

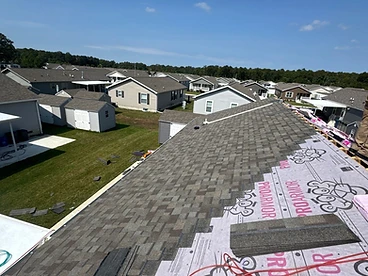
Chalk lines keep every course straight as shingles step up the slope

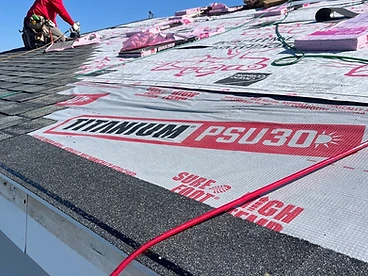
Starter strip down, chalk lines struck — the first shingle course begins

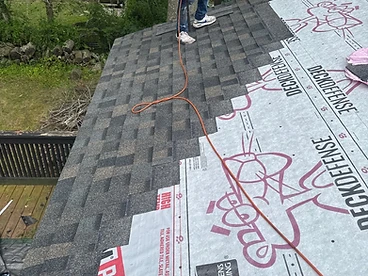
Shingles step up the slope — each course covering the nails of the one below
Installation Day
Flashing & Penetrations
As we shingle up the roof, every penetration is flashed the moment it's reached — not patched in later. Pipe boots, chimney, step, wall, and skylight flashing are all installed and sealed exactly as the manufacturer directs. Done right, flashing is where a roof earns its warranty — and where a homeowner gets peace of mind that the most leak-prone spots on the roof are sealed for the long haul.
Flash Every Penetration
- As shingles step up the roof, every penetration is flashed as it's reached — not patched in later
- Pipe boots are sized to each vent, sealed at the collar, and nailed through the shingle below
- Chimneys get step flashing woven into every course, plus apron and counter flashing at the base
- Where the roof meets a wall, step flashing is integrated course by course so water always sheds out
- Skylights are flashed with the manufacturer's kit — installed exactly to their instructions
- Every flashing is sealed with the right sealant, applied as directed, for full warranty coverage
- Your Project Supervisor inspects every penetration for proper overlap, seal, and coverage before moving on

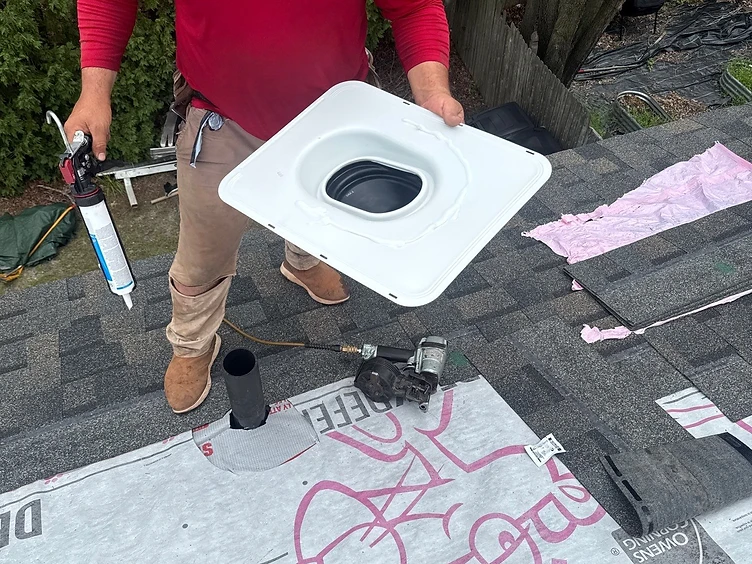
Pipe boot flashing sealed and installed over every plumbing vent
Every Penetration, Properly Flashed
Pipe Boots
Every plumbing vent gets a properly sized, sealed pipe boot flashing.
Chimney Flashing
Step and apron flashing woven into the shingles around the full chimney.
Step Flashing
Where a roof meets a vertical wall, step flashing is woven into every course.
Wall Flashing
Any roof-to-wall transition gets counter flashing and sealant per manufacturer specs.
Skylight Flashing
Skylights get the manufacturer's flashing kit — not a caulk-and-pray fix.
Sealants
Every penetration sealed with the right sealant, applied as the manufacturer directs.

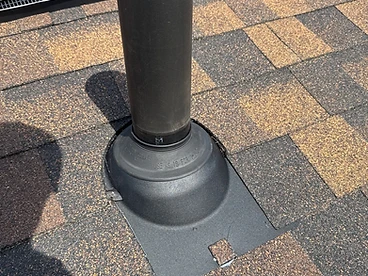
Sealant at every collar and flange — no gap left unsealed

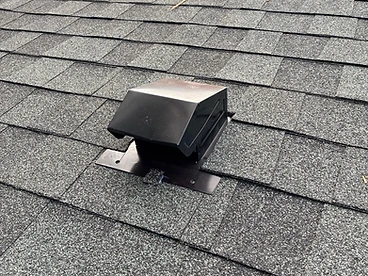
Vents flashed so water sheds over, never under, the flange

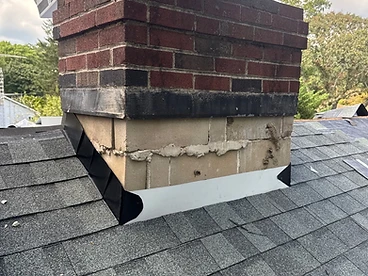
Chimney step flashing woven into every shingle course

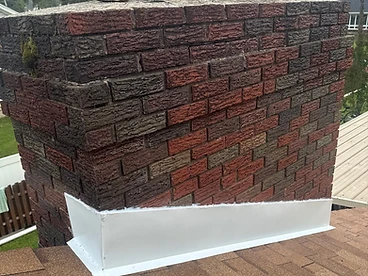
Apron flashing sealed at the chimney — caulked for a watertight tie-in
Installation Day
Ridge Vent & Attic Ventilation
Once the shingles reach the top of the ridge, a proper ridge opening is cut at the peak to let heat rise and escape the attic. Adequate ridge vent is then installed over that opening — keeping the elements out of the home while still allowing heat to safely vent. Proper attic ventilation is one of the most crucial parts of the entire process: without it, the manufacturer's warranty is voided and the roof will fail prematurely as trapped heat and moisture rot the deck and shingles from the inside out.
Vent the Attic at the Ridge
- Shingles are run all the way to the top of the ridge, finishing every slope
- A proper ridge opening is cut at the peak to allow heat to rise and escape the attic space
- Adequate ridge vent is then installed over that opening — sized to the attic's ventilation needs
- The ridge vent keeps rain, snow, and wind out of the home while still letting heat safely rise and escape
- Proper attic ventilation is a crucial part of the entire process — without it, your warranty is voided
- A roof without proper ventilation will fail prematurely — trapped heat and moisture rot the deck and shingles
- Your Project Supervisor confirms the ridge opening and vent match the attic's required net free vent area before cap shingles go on

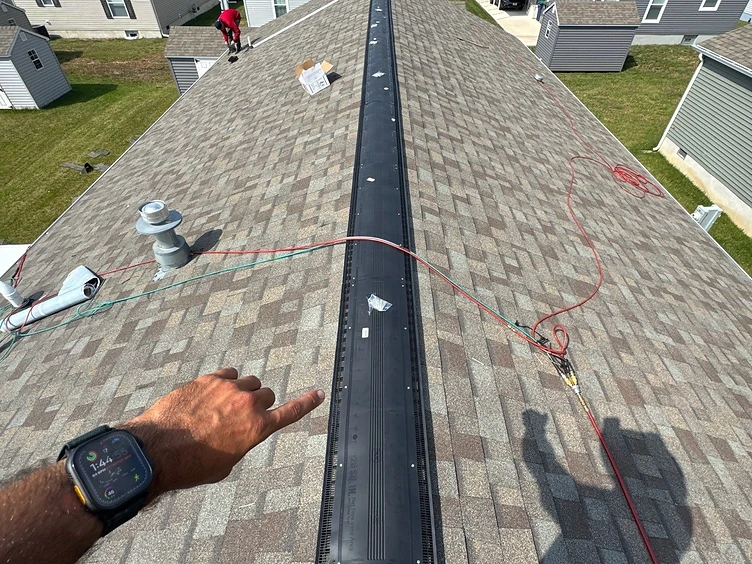
Ridge vent runs the full length of the peak — heat rises and escapes here

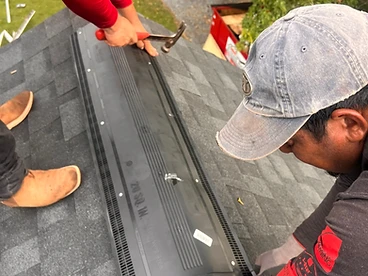
Ridge vent fastened along the peak — sized to the attic's ventilation needs

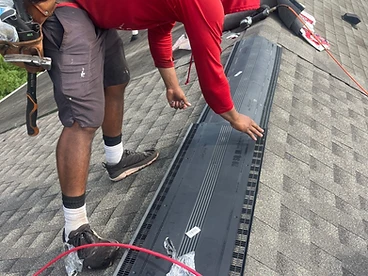
Continuous ridge vent keeps the elements out while letting heat escape

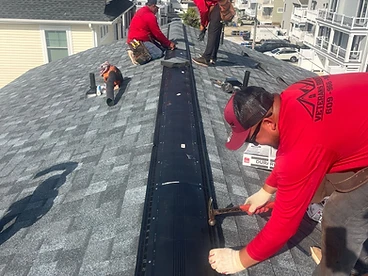
The crew works the ridge together — vent installed end to end

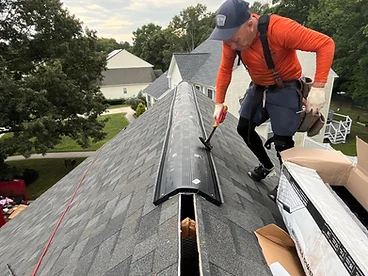
Every section fastened to manufacturer spec — no gaps, no loose edges

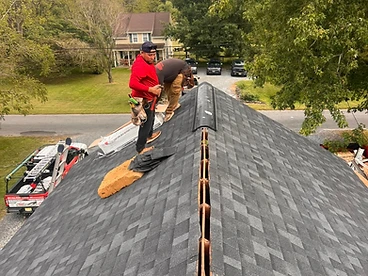
Ridge vent complete — the roof breathes from eave to peak
Installation Day
Hip & Ridge Caps
Once the ridge vent is in, the hip and ridge caps go on — the finishing layer that seals every peak and hip line on the home. Cut from the same shingle line as the field so the color matches, each cap overlaps the one below it so every nail is covered and water sheds cleanly off the peak. Every hip and ridge on the home is capped, not just the main ridge, for a complete, weather-tight finish.
Cap the Hips & Ridge
- With the ridge vent installed, hip and ridge cap shingles are cut and laid to finish every peak and hip line
- Caps are installed starting at the bottom of each hip, overlapping upward so every nail is covered by the next cap
- Each cap is fastened to manufacturer spec — proper exposure, proper nail placement, proper seal
- Caps are cut from the same shingle line as the field so the color and texture match the roof
- Every hip and ridge on the home is capped — not just the main ridge — for a complete, weather-tight finish
- The overlapping cap profile is what sheds water off the peak and keeps the ridge vent protected underneath
- Your Project Supervisor walks every hip and ridge to confirm straight lines, tight overlaps, and a clean finish before the crew comes down

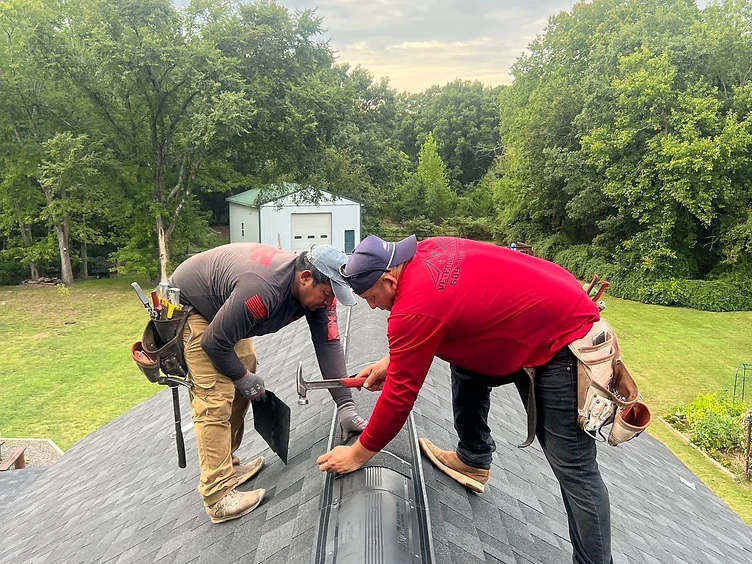
Ridge caps fastened over the vent — the finishing layer at the peak

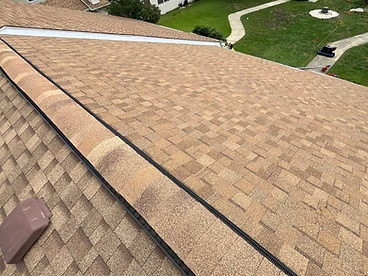
Caps overlap down the ridge, sealing the vent beneath

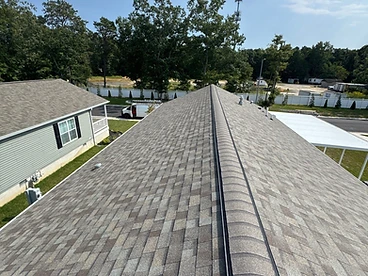
Staggered, overlapping caps — a clean, finished ridge

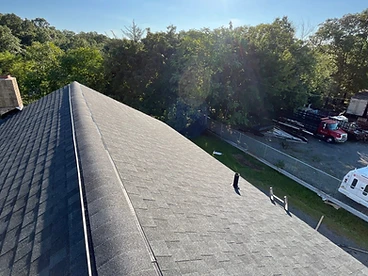
Thick, rounded caps seal every hip and ridge line

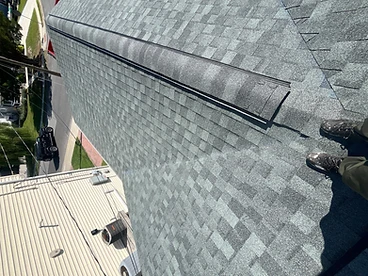
Hips capped the same way — every external ridge sealed
The caps are the last shingles on the roof — and the first thing people see.
Installation Day
Thorough Clean-Up
Once the last hip and ridge cap is fastened, the job isn't over — it's time for a thorough cleanup. Every piece of debris is collected and bagged, and a magnetic sweep is run across your entire property — lawn, driveway, walkways, gravel beds, and right up against the foundation — until the magnet comes back clean. No debris gets left behind.
Sweep Until It's Clean
- Once the last cap is on, the crew shifts to a thorough cleanup of your entire property
- All loose debris, felt, and packaging are hand-collected and bagged — nothing gets buried or blown off
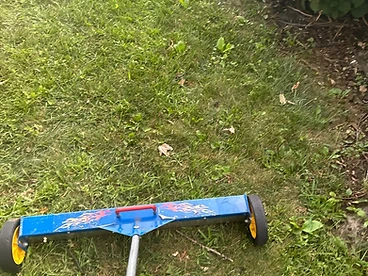
- A magnetic sweep is run across the lawn, driveway, walkways, gravel beds, and every edge of the home
- The magnet goes right up against the foundation, AC units, landscaping, and any spot a nail could settle
- Collected nails are pulled off the magnet and bagged — not shaken out onto the ground
- The sweep is repeated until the magnet comes back clean — not just once and done
- Your Project Supervisor does a final walk of the property with you before the crew leaves
- We leave your home and yard cleaner than we found it — that's the standard, not a bonus

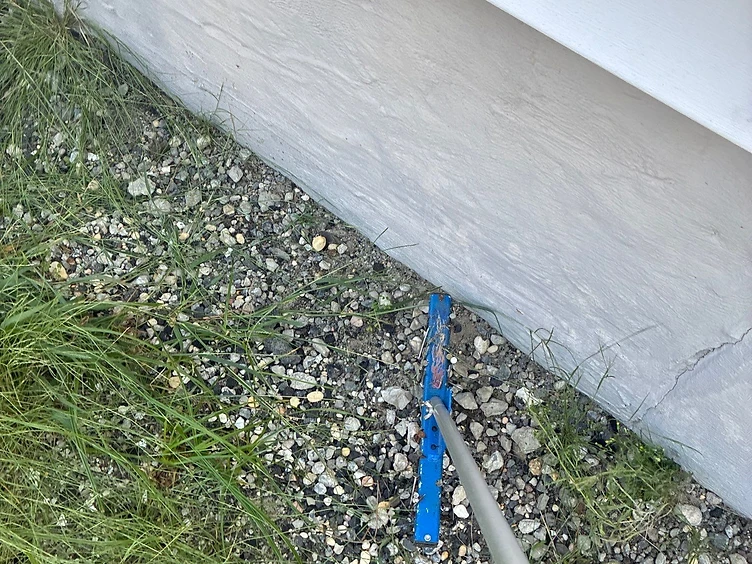
Magnetic sweep along every wall — nails picked up, not left behind

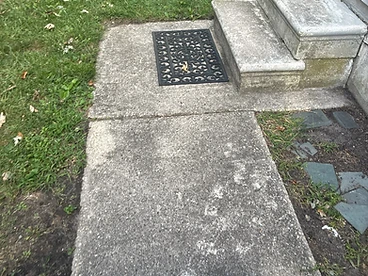
Driveways and walkways swept — every hard surface checked

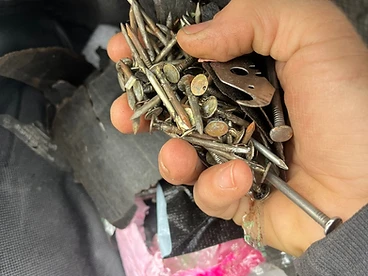
Every nail collected off the magnet and bagged — nothing tossed aside

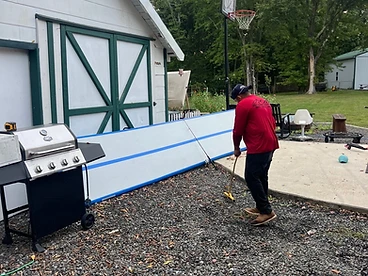
Gravel beds and landscaping swept just as carefully as the lawn

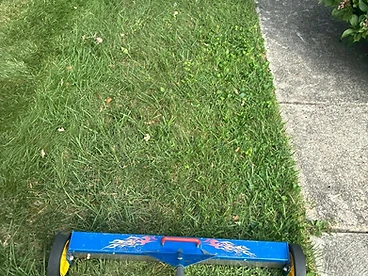
The lawn gets a full magnetic sweep — not just the perimeter

Garden beds and shrubs swept without disturbing the plantings

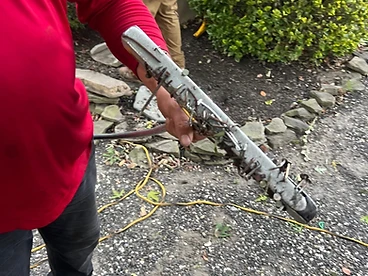
The magnet tells the truth — this is what would have been left in your yard

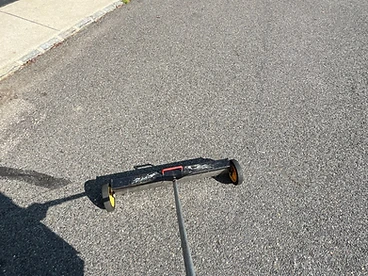
Driveway and street edge swept before the crew packs up

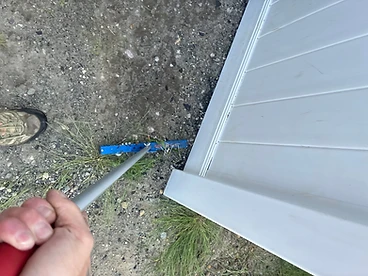
Right up against the foundation — where nails settle deepest

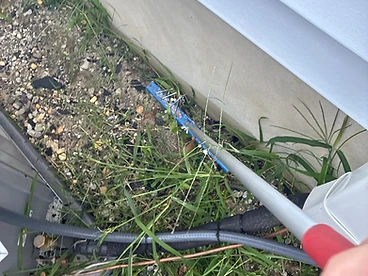
Around AC units, hoses, and utilities — every gap checked
We sweep until the magnet comes back clean — then we walk the property with you.
What to Expect on Job Day
Our Debris Trailers
On every exterior project we install, our company-owned debris trailer is delivered to your property at the start of the project and removed at the end — same day. We don't rent commercial dumpsters from a third-party company; we own, operate, and are fully responsible for every trailer on your job site, from the first shingle torn off to the final sweep.

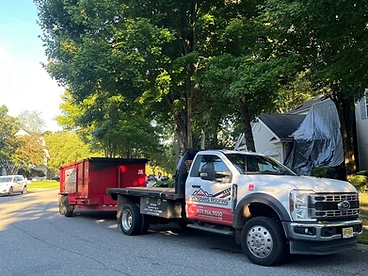
Delivered to your job site at the start of the project

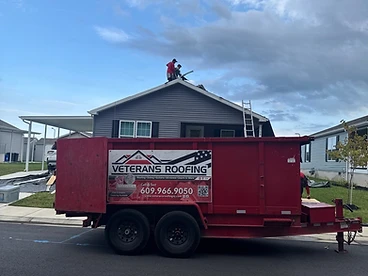
Placed for easy access — street or driveway, wherever fits best

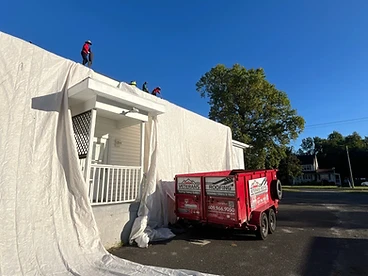
On-site alongside our tarping and property protection

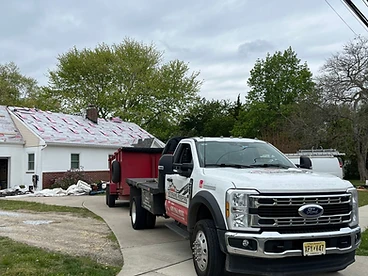
Company-owned truck and trailer — not a rented dumpster

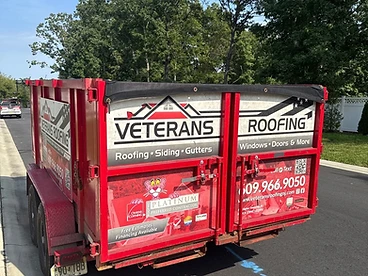
Fully branded, professional equipment on your street

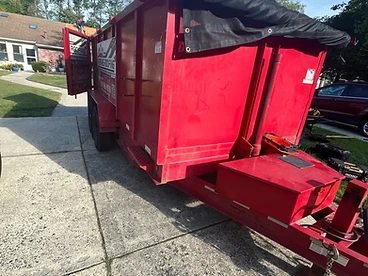
15 cubic yards of capacity — room for the full tear-off

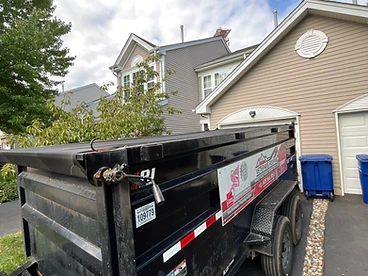
Tarp keeps every load covered and contained

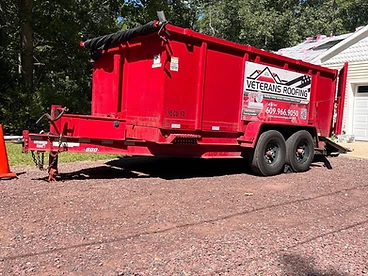
Hauled away the moment your project is complete

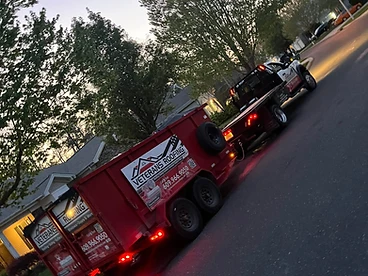
Removed same day — towed off your property when the work is done

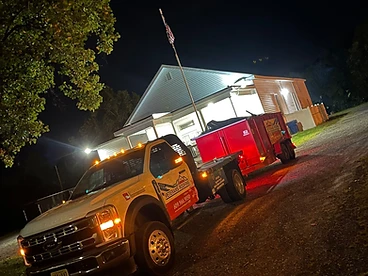
Our crew, our truck, our trailer — start to finish
Owned & Operated By Us
Every debris trailer is owned, maintained, and operated by Veterans Roofing — not rented from a third-party company. Our crew is fully responsible for placement, loading, and removal.
Same-Day Removal
When your project is done, the trailer goes with us — same day. No waiting days for a third-party company to pick up a commercial dumpster sitting in your driveway.
Full Site Control
We control where the trailer sits, how it's loaded, and when it leaves. That means a cleaner, safer job site and zero liability issues from a third-party container on your property.
Proper Disposal
We haul debris directly to the appropriate facility ourselves. Nothing is left on your property, and nothing is dumped improperly. We handle it from start to finish.
Our Trailers vs. Commercial Dumpsters
The difference matters — for your property, your timeline, and your peace of mind.
Veterans Roofing Trailers
- Owned & operated by Veterans Roofing
- Removed same day when the job is done
- Our crew controls placement and loading
- Branded, professional equipment on your street
- No third-party liability on your property
- Direct, proper disposal — we haul it ourselves
Third-Party Commercial Dumpsters
- Rented from a third-party waste company
- Sits in your driveway for days after the job
- Dropped off and picked up on their schedule
- Generic, rusty commercial dumpster
- You may be responsible for damage while it sits
- You hope the third party disposes of it correctly
Frequently Asked Questions
Ready to Get Started?
Schedule your free, no-pressure inspection today and get a clear, detailed estimate from South Jersey's veteran-owned exterior experts.
Request Your Free Estimate
Fill out the form below and we'll contact you to schedule your free roof inspection.
Book Your Inspection Online
Choose how you'd like to get started — book online or have our team reach out.
Book Online Now
Pick a time that works for you — real-time availability
Request a Call Back
Submit your details and we'll reach out to you